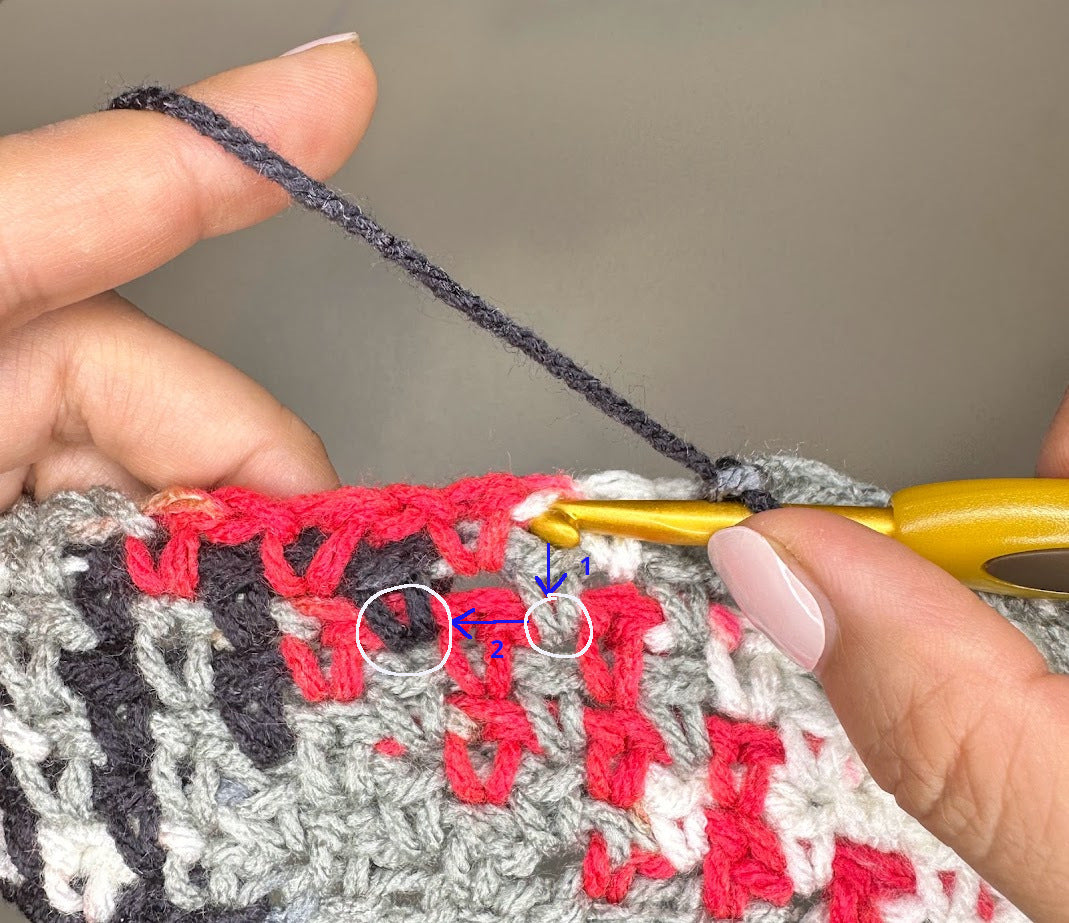
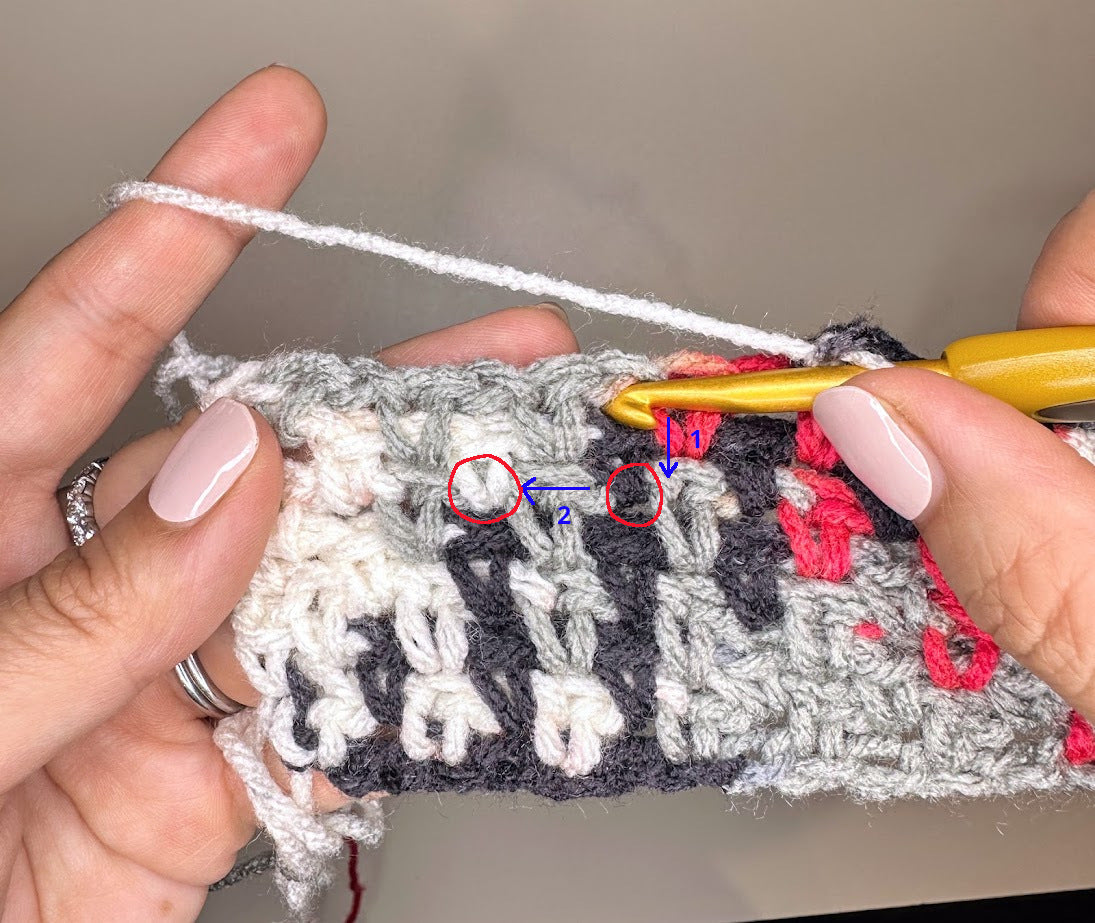
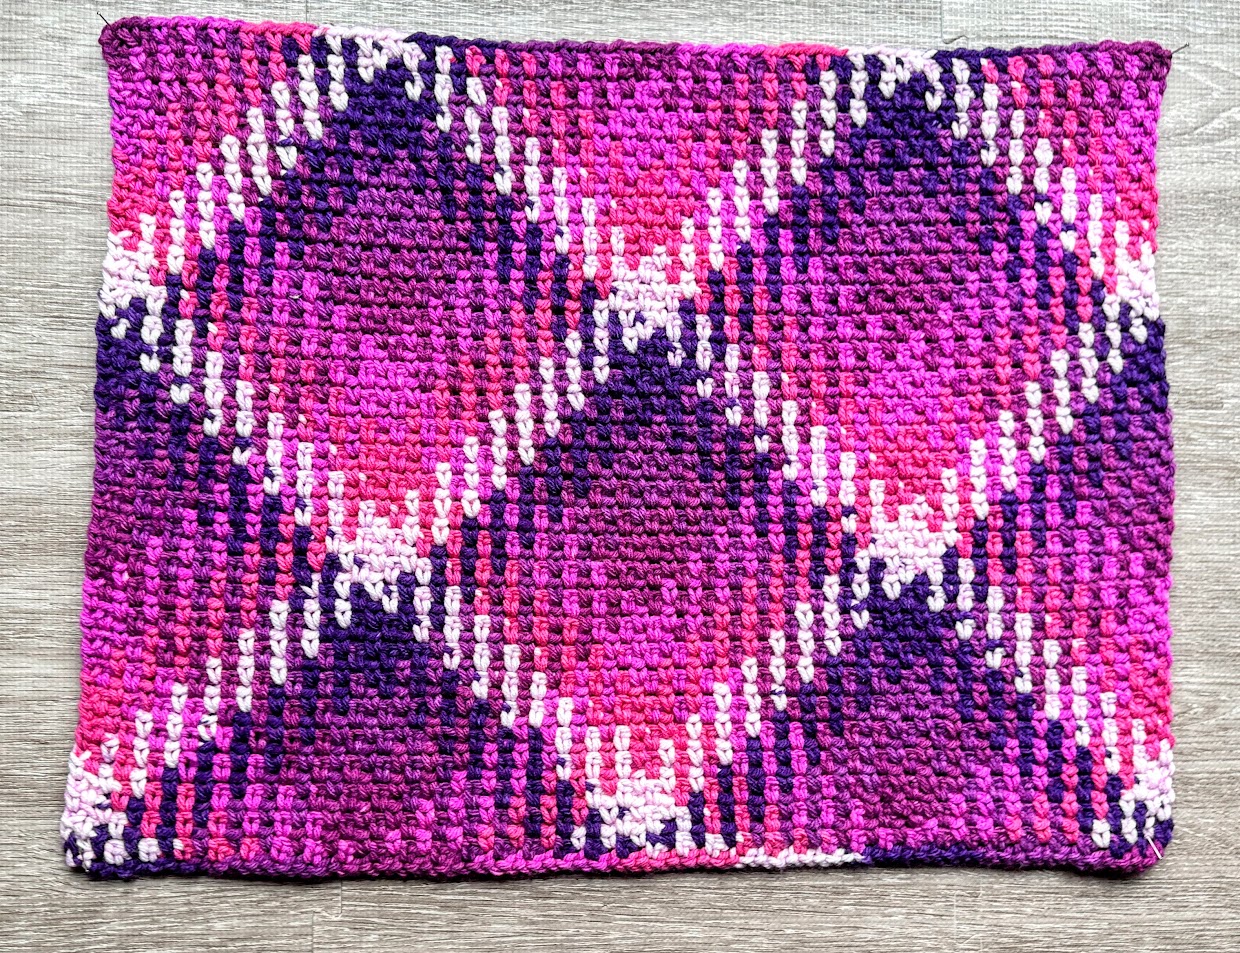
top of page
logo4.png

Color Pooling Crochet

Tutorial: Easiest Planned Pooling Method

Updated: Jan 29

Before I start any project, I first make a swatch. These work up very quickly and give you an idea of what kind of yarn you are working with and if you need to adjust your tension or hook size. I highly recommend always doing a swatch before starting any project. It will save you a lot of frustration in the long run.


There are many methods to planned pooling, but after many hours of trial and error, I found this method to be the easiest. With this method, I do not have to look at charts, deal with wonky edges or fudge stitches to get the pattern to show. It is consistent and works with every variegated yarn that is able to color pool.


The yarn I am working with today is Red Heart Super Saver Pooling Yarn in colorway: Haute. If this is your first time planned pooling, I highly suggest a pooling yarn. They are made to be very beginner friendly. They usually have easy sequences and consistent lengths of color. Please check out my yarn list to pick out one that you like.


Step 1

The first thing to do is to find the yarn's color sequence before it repeats. In this yarn, the sequence is white, gray, red, white, gray, black.


Step 2


Now that you have found the sequence, you will chain through one full sequence. In my case, I chained through white, gray, red, white, gray, black. I stop when I have the next color of my sequence on my hook. In my case, it is white. Here is a close up:


Step 3


Now we will start our crocheting. For this project, we will use the moss stitch (sc, ch1, sk 1, repeat to end) . I start in the second chain from the hook and place my first stitch. I continue until I have used up that color. In this case, I was able to fit 3 moss stitches in white. This is my "magic" number with this set of white stitches. You want to end with the next color on your hook. (In this case, gray) If you find this is not the case, you can unravel (frog) your stitches, then loosen or tighten your stitches or use a different size hook to adjust. Please be aware, you may end up with a different number of stitches than mine. If you end up with 4 stitches as your "magic" number, that is ok. Just remember that magic number for that color set in the sequence.


Step 4


I continue working on the first row with my next color, gray. Here I was able to fit in 3 stitches before it turned to the next color, red. So for this set of gray stitches, my "magic" number is 3.


I continue in the same manor with my red. It is also 3 stitches before the next color, white.


I continue with white, again 3 stitches. Please be aware that all yarns may be different. You may purchase the same exact brand and color of yarn at your store, and it may have different lengths of colors than mine. This is why it is very important to purchase the same lot numbers when you buy your yarn for a project.


I continue with gray, again 3 stitches, until I reach my last color, black.


Step 5


This next step is the most important and the secret to making a clean planned pooling project. My last color of my sequence before I turn my project is black and it, like the other colors, works up with 3 stitches. BUT, instead of keeping the 3 stitches, I frog them, tighten my tension, and place 4 stitches instead.


The reason why we add this extra stitch is two fold. The first is to create an offset stitch. This offset stitch is an extra stitch on every other row that will create the offset shift that is necessary to make the argyle/plaid pattern. This offset stitch can be made with any color on the first row, so if you find one of your colors to have a little extra yarn length, you can use that color to create the offset shift.( It does not have to be the last color on your row like mine). Once you have selected your offset stitch, place a stitch marker near that color to remind yourself to create that offset extra stitch every other row.


Here is a zoomed in picture of what I just explained. The other reason we do this extra offset stitch is to create straight edges in your piece. By adding this extra stitch, you do not need to chain at the beginning or ends of rows or deal with tension issues like other planned pooling methods.


Now we turn our work and start on row 2.


Note:

If you are making a blanket and have multiple sequences, you only have to do this extra off stitch once in the whole row. (on the first row and every other row). In my case, if I was making a blanket, I would have 4 black stitches once on every odd row (where I would place my stitch marker). In every other case of black stitches, I would continue with 3 stitches, my "magic" number.


Step 6


This is what the start of row 2 should look like. You will notice that we did not use the rest of our chains on the previous row. This is because a sequence of moss stitches will eat up more yarn and appear to be shorter than the length of a sequence of chains. When our project is all done, we can easily unravel the excess tail and weave it in. The excess tail is also a good indicator of if you are on an odd row or even row. If the tail is on the right, you are working on an even row. If it is on the left, you are working on an odd row.


Step 7


For the second row, place your next set of stitches. Our row 2 starts with 3 white stitches. Continue to the end of the row placing the correct number of stitches each time. ( In our case, our "magic" numbers are 3 white, 3 gray, 3 red, 3 white, 3 gray, 3 black) Note that since this is an even row, we will not add the offset stitch in the second set of black (stitch #16,#17,#18). We only add that extra stitch on the odd rows where we placed our stitch marker. The last stitch on the second row should be the next color of our sequence (in our case, white #19)


This is what our piece should look like. We will now turn our piece and our excess tail should be on the left side, indicating that we will be working on an odd row (row 3).


Step 8


If you remember, we ended row 2 with 1 white stitch. On row 3, we start the row by finishing off the other 2 white stitches. (because our magic number for white is 3) We continue to the end of the piece remembering to place 4 black stitches where our stitch marker reminds us of the offset stitch.


Here are our 4 black stitches. You will eventually need to move your stitch marker as your work progresses. End with the last stitch, which is white. Then turn your work and continue to work as normal through row 4.


Step 9


This is what Row 4 should look like when it's done. Remember, row 4 is an even row, so you do not need to worry about the extra offset stitch. When you get to the end, turn your work and work through row 5.


Step 10


This is what row 5 looks like when finished. It is an odd row, so it will have the extra offset stitch.


Step 11


Continue to work in the same manor until you get to your desired length. You will eventually start to see the argyle pattern form.


And that's it! Easy peasy! No charts, minimal tension changes, no need to chain at the ends of rows and straight edges!


Here are a few extra tips:


You should know if your planned pooling is working by the 3rd row. By the 3rd row and every row after, you should be able to see your stitches start to offset. Let's take a closer look at our 4th row. In this picture, you will see the stitches start to shift up and to the right by 1.


When we turn and finish the 5th row, you will see the stitches again shifting up and to the right by 1.


The previous even rows, because the work has been turned, now appear to be shifting up and to the left. This is what causes the argyle pattern.


Another Tip:


Stitch placement is very important with planned pooling. You always need to be sure you are placing the right color stitch in the right place. An easy way to check what color stitch needs to be placed next is by looking at the stitch that is one row down and to the left. This is the color that needs to be placed next. In this next picture, I want to place my stitch where my hook is about to enter. If I look one stitch down and one stitch to the left, I see it is a black stitch. I know my next stitch must be black. As you can see by my yarn, the next stitch will be black, so I know I am on the right track.


Let's try that again. In this next picture below, I want to know what color to place in my hook space. If I look one stitch down and one stitch to the left, I see the stitch is white. I know that my next stitch must be white, and as you can see from my yarn, it will be. Whenever I am confused at what color to place next or if I have made a mistake somewhere, I use this method to confirm if my stitches are correct.


Going from swatch to something bigger:

Now that you have gotten the hang of planned color pooling, how do we go from a swatch to a blanket?


First, we would chain more sequences on our chaining row. In our swatch, our starting chain had one color sequence. For a blanket, you may want to do 10 sequences or maybe 20. Use your swatch to calculate how many sequences you want to chain.


Next, you would continue to crochet the moss stitch exactly as we did on our swatch, remembering to add an extra offset stitch somewhere on the first row (and every odd row after.) Place a stitch marker next to the offset stitch to make it more visible.


For the first row, always crochet through whole color sequences. Half sequences are sometimes possible with long color changing yarn, but can get a little more tricky. For example, if your chaining row has 10 full color sequences, make sure your Row 1 has at least 10 full sequences of the moss stitch. You may be able to fit 11 or more, but be sure that you always end with a full color sequence. Don't just end in the middle of a sequence and turn your work. This is where many projects go wrong.


And that's it! By row 3, you should be able to see if you are doing it correctly. Your stitches should start offsetting (shifting) by 1.


Happy Planned Color pooling!

1,999 views0 comments

Recent Posts

See All

Commentaires


bottom of page